Getting started
Create a Waitlist
Creating your first waitlist with Waitlister is straightforward. This guide will walk you through the entire process.
If you don't have a Waitlister account yet, you can create one for free here.
Step-by-Step Guide
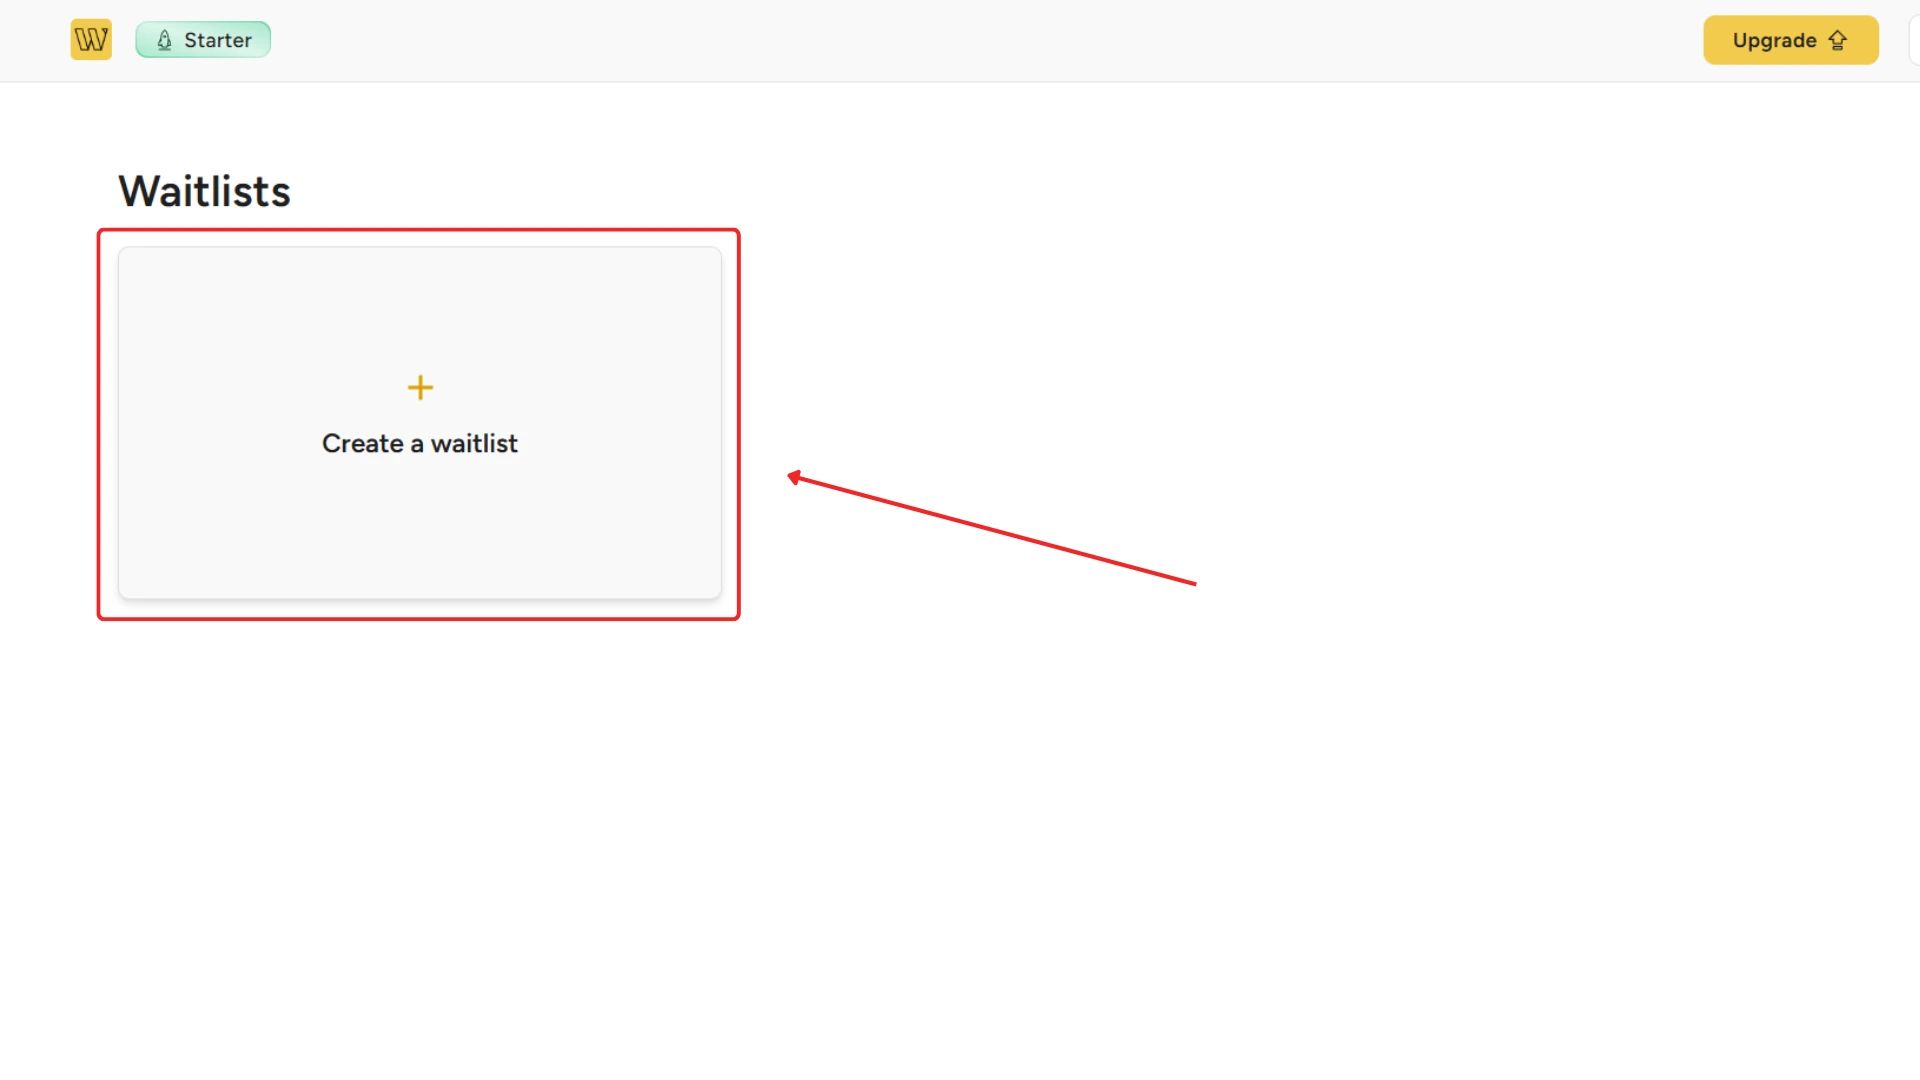
After you've created an account and logged in, you'll be redirected to the "Waitlists" page. This is where you can view all your waitlists, as well as create new ones.
Click the "Create a waitlist" button.

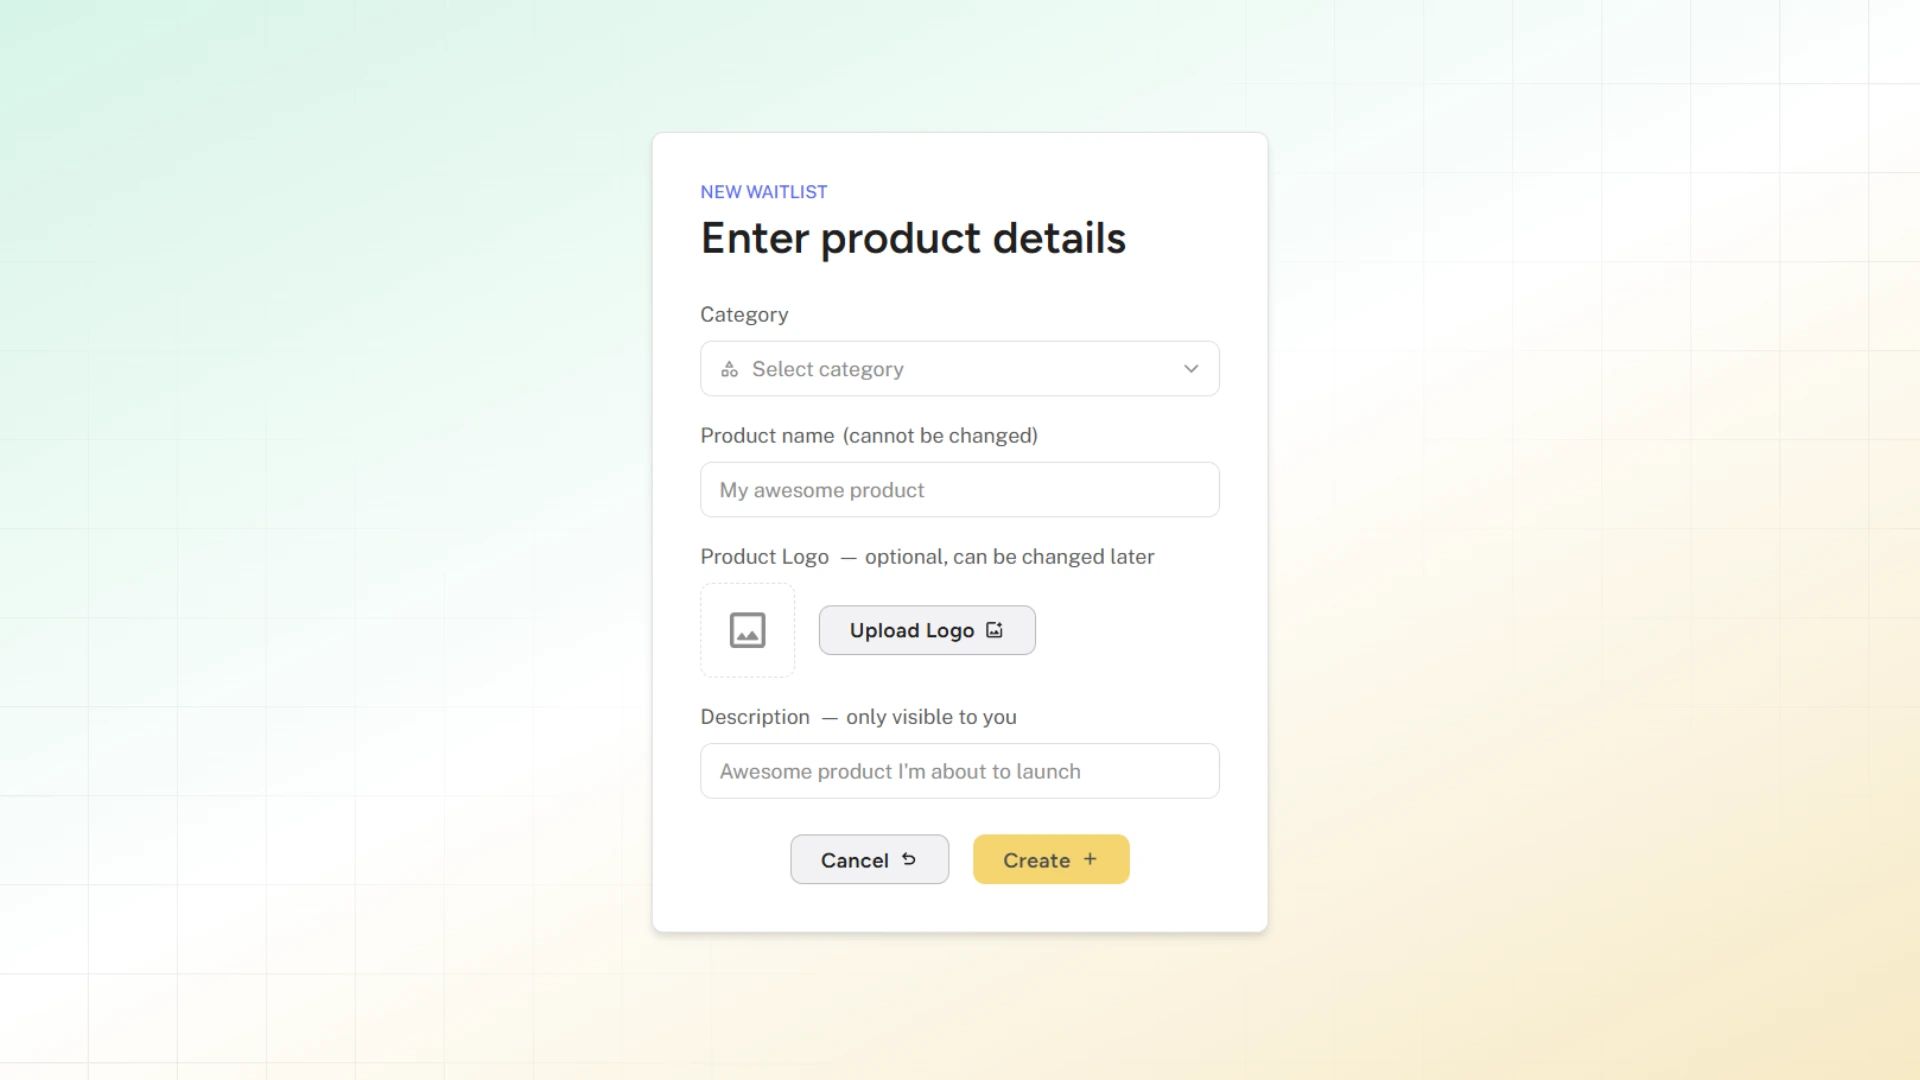
Next, enter your product's details. Select a category, a name, upload a logo (optional) and add an internal description (visible only to you).
You cannot change the product name, but you can change other details later. If you are not happy with the name or are just testing, you can easily create a new waitlist (it's free).
Once you've entered all the details, click "Create".

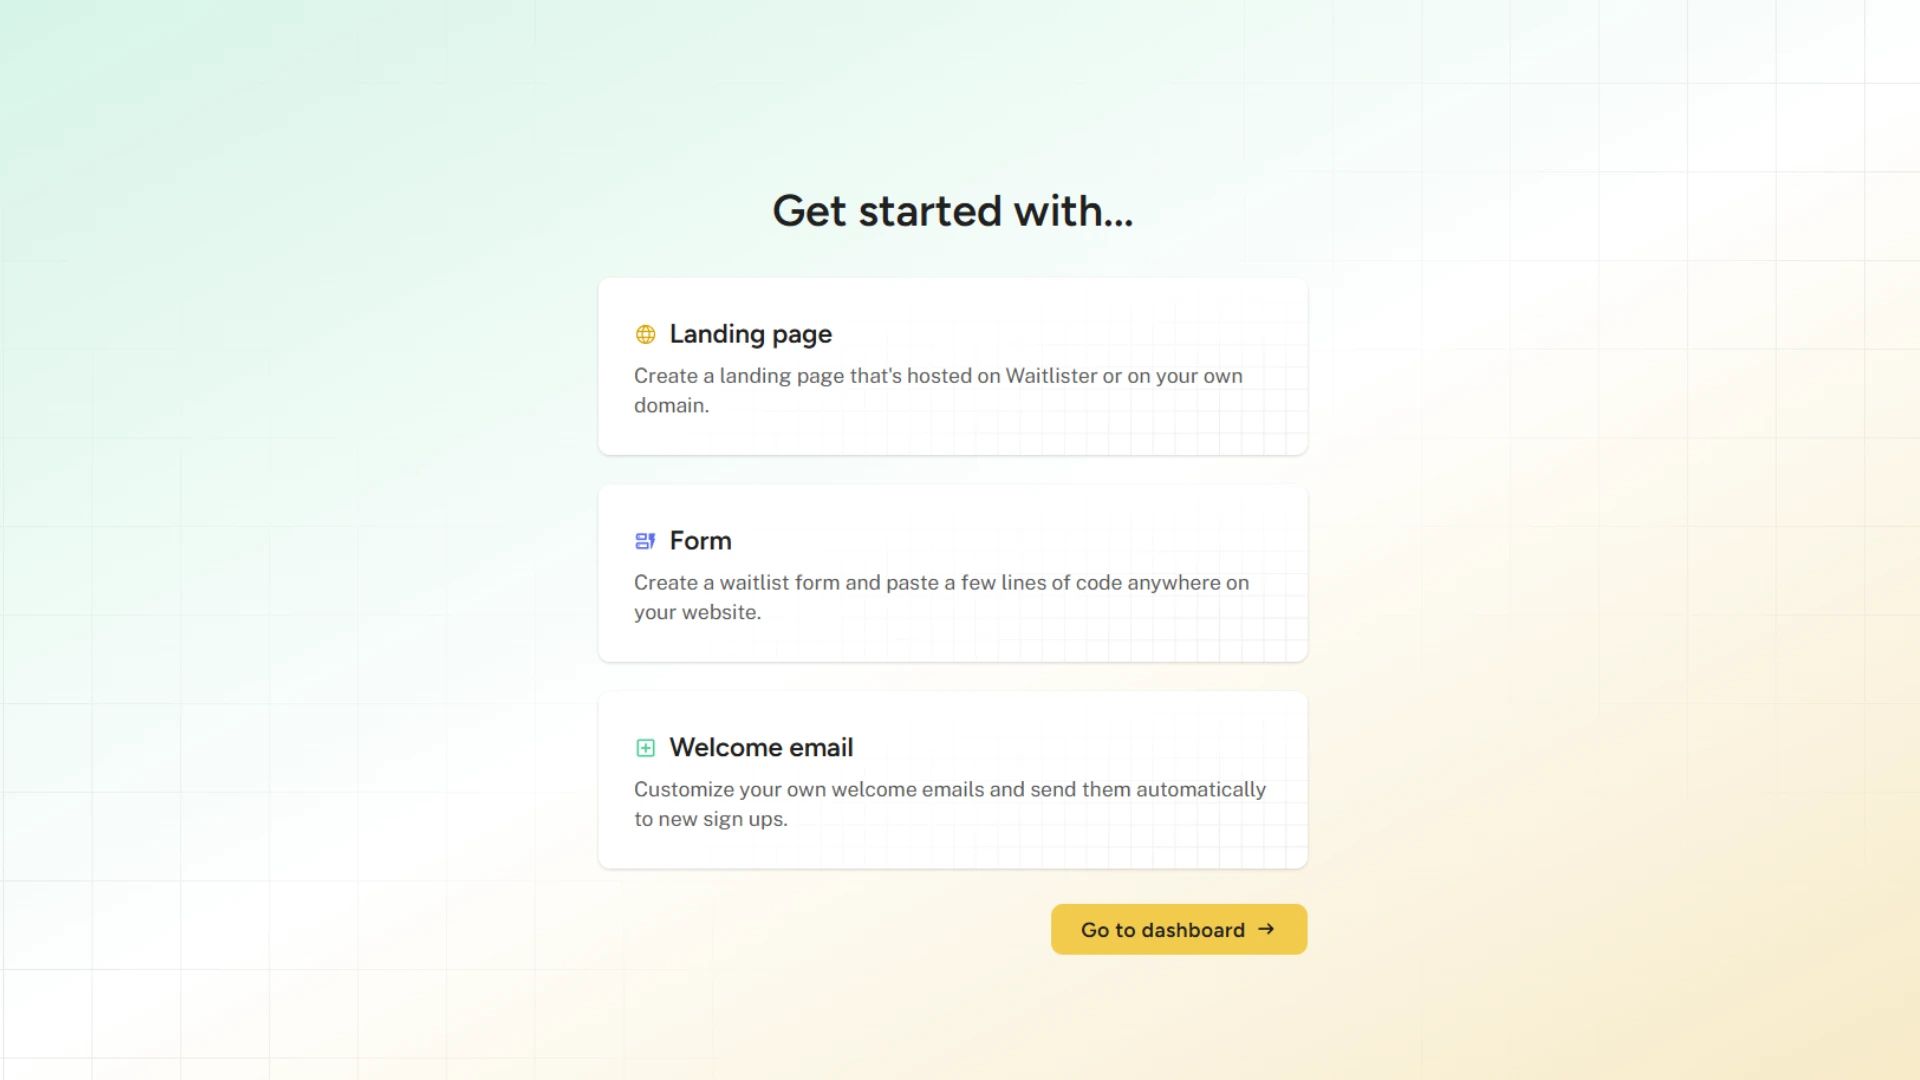
On the next page, you will see a few quick links to get started.
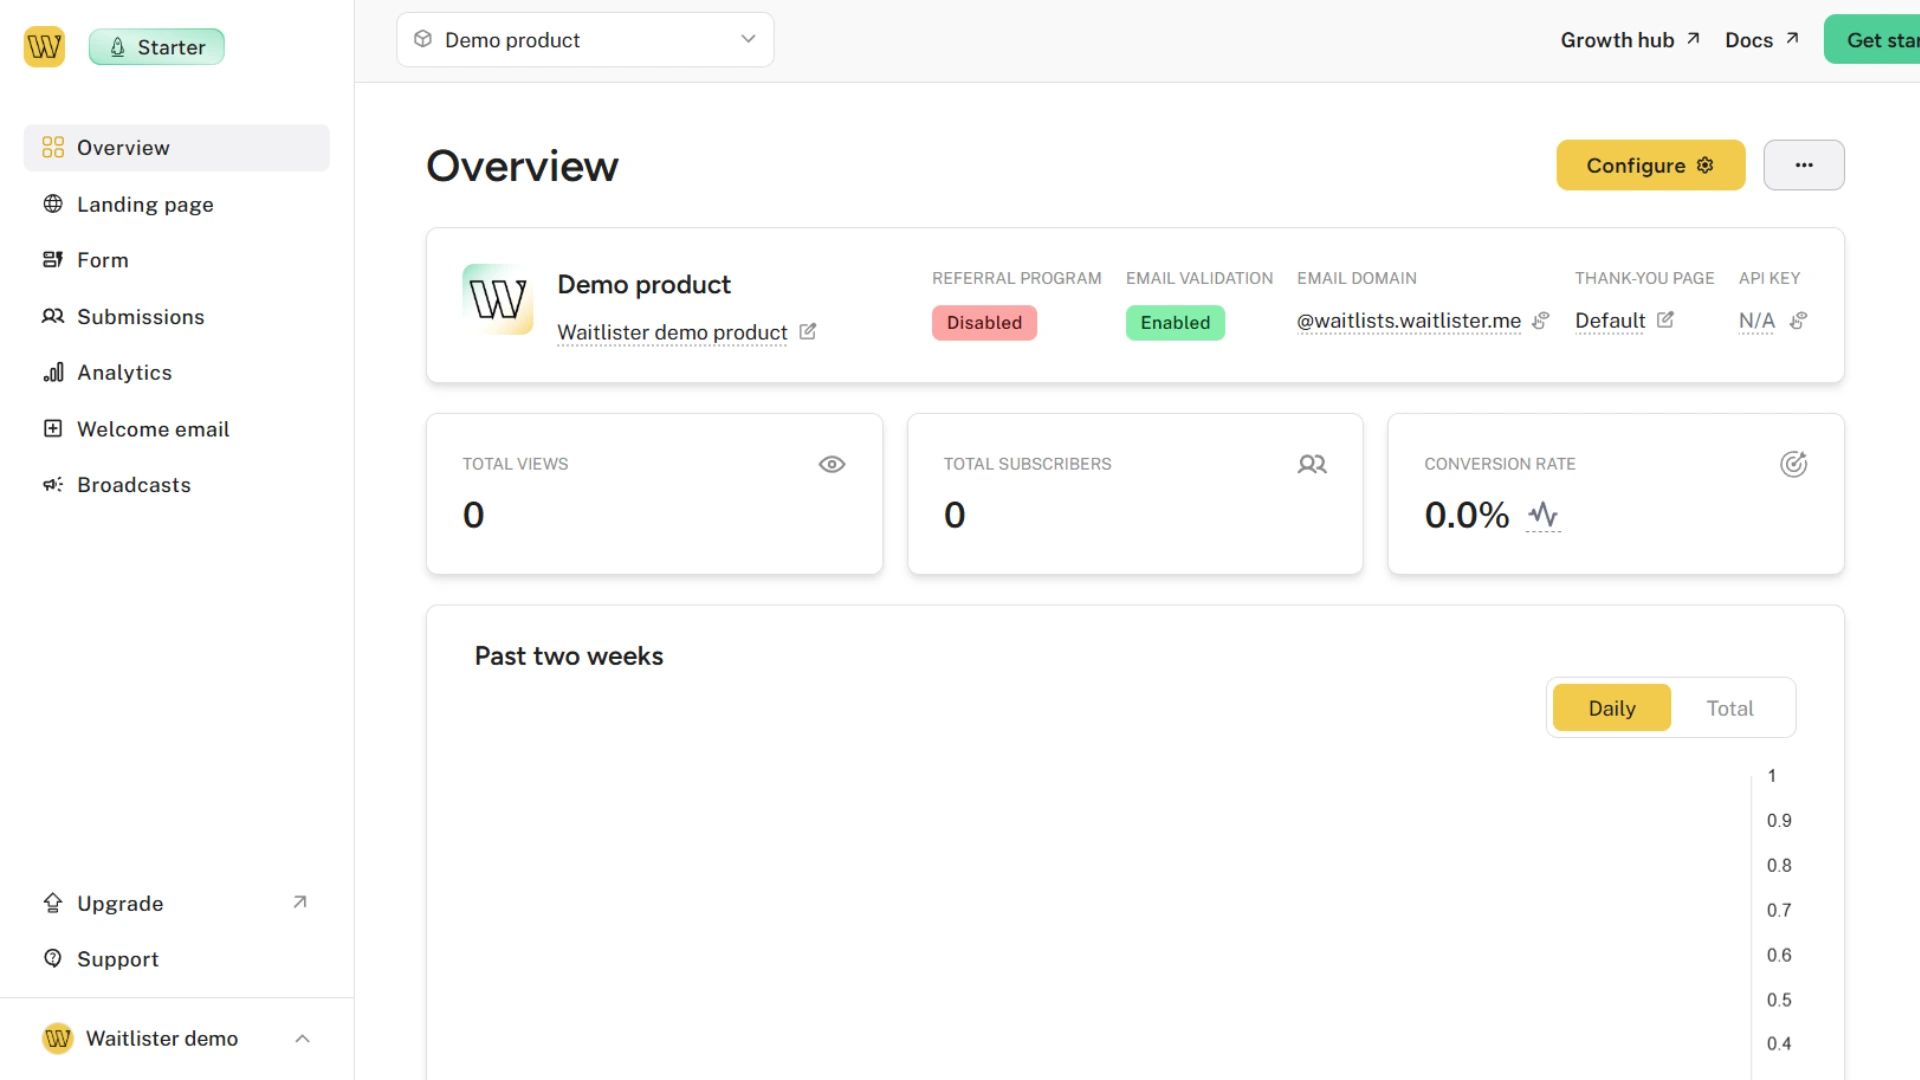
You can choose to start with creating a landing page or form, customizing welcome emails, or simply head to your dashboard.

And that's it! Your waitlist is created. Whenever you need a new one, the steps are the same — you can create unlimited waitlists for free.

Next Steps
Next, you might want to:
- Check your waitlist configuration and update it if needed.
- Either create a landing page,
- or create an embeddable form if you want to display a waitlist form on your website.
We also provide an API for adding subscribers and logging views for your waitlists from external applications.
Help and Support
Need assistance? We're here to help you make the most of Waitlister.
- Contact us via the public contact form
- Access the "Help" page in your account dashboard for direct support
