Waitlist
Landing Page
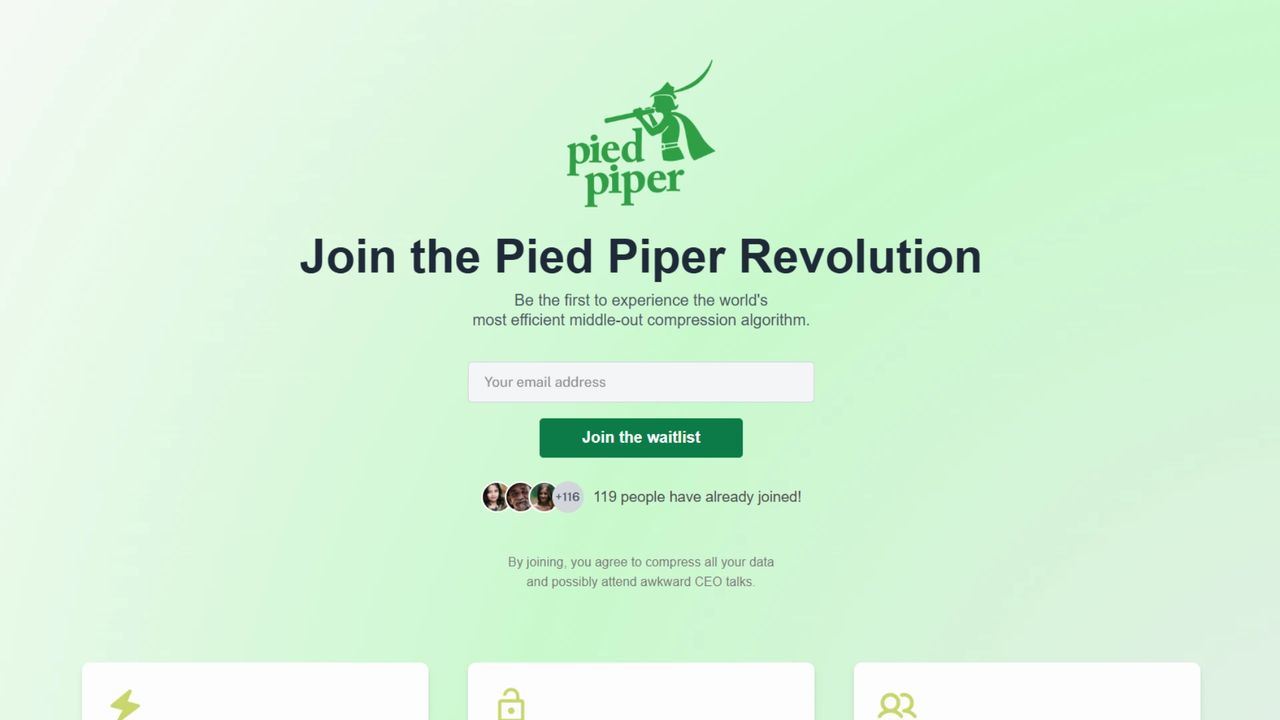
The landing page builder lets you create conversion-optimized waitlist pages without writing any code.
With its drag-and-drop interface, you can design professional pages that match your brand in minutes.
Editor Interface
When you access the landing page editor, you'll find these key elements:
Top Toolbar
The toolbar at the top of the editor provides some essential controls.
- Device Preview Buttons: Switch between desktop, tablet, and mobile views to make sure your page looks good on all devices
- Undo/Redo: Revert changes or reapply them with these history controls
- Save/Publish: Save your draft or publish your landing page
- Preview: View your landing page as visitors will see it
Left Sidebar
The sidebar on the left has two tabs at the top:
- Theme: page-wide settings
- Template selection
- Background options (color, gradient, pattern, or image)
- Page padding controls
- Font selection for titles and body text
- Cookie consent settings
- Components: categorized sections you can drag onto your page
When you select a component, column, or container on the canvas, the sidebar switches to show that element's individual settings.
Main Editing Canvas
The central area shows a live preview of your landing page where you can:
- Drag and drop components
- Click components to edit them
- Rearrange sections with drag handles
- See exactly how your page will look
Getting Started
Creating a New Landing Page
- Navigate to your waitlist dashboard
- Click "Landing page" in the left navigation
- Click "Create landing page" if you haven't created one yet
Using Templates
To start with a pre-designed template:
- Open the Theme tab and click "Select template" at the top
- Browse through the available templates
- Click on a template to apply it to your page
Templates are fully customizable, so you can modify colors, fonts, and content to match your brand after applying a template.
Page Structure
Your landing page is built from various components that you can add, remove, and rearrange. These components are organized into categories for easy access.
Layout Components
- Container: Create multi-column layouts that can hold other components
- Responsive stacking of columns
- Adjustable column gap
Content Components
- Title: Large headline text (required for all pages)
- Text: Paragraphs of body text
- Badge: Small highlight text with customizable styling
- Link: A standalone link or button (available on paid plans)
- Image: Upload and display images
- Video: Embed videos from YouTube, Vimeo, or upload your own
- Features: Display product features with icons and descriptions
- Divider: A horizontal line to separate content
Form Components
- Email Field: Input field for collecting email addresses (required)
- Name Field: Optional field for collecting names
- Phone Number Field: Optional field for collecting phone numbers
- Custom Field: Collect any extra information with your own field and label
- Submit Button: Button for form submission (required)
- Survey: Add custom questions to gather additional information
Social & Engagement Components
- Social Links: Links to your social media profiles
- Social Proof: Display the current number of subscribers
- Subscriber Goal: Show progress toward a subscriber target
- Leaderboard: Display top referrers on your waitlist
- Countdown Timer: Count down to your launch date
Advanced Components
- Check Waitlist Status: Allow users to check their position on the waitlist
Working with Components
Adding Components
- Open the Components tab and find the component you want
- Drag it onto your page at the desired position
- On mobile, you can tap a component in the sidebar to add it to the bottom of your page
Editing Components
- Click on a component to select it
- Use the sidebar to customize its properties
- Changes appear in real-time on your page
Rearranging Components
- Hover over a component to reveal the drag handle on the left side
- Click and hold the drag handle
- Drag the component to its new position
- Release to drop it in place
Duplicating and Deleting
When you've selected a component, you'll see a floating action bar with different options.
- Duplicate: Create an exact copy of the component
- Delete: Remove the component from your page
Working with Containers
Containers allow you to create multi-column layouts.
- Adding columns: Click the "Add column" button in the container to add a new column (up to a maximum of 3)
- Column content: Drag components directly into columns
- Column spacing: Use the gap controls to adjust spacing between columns
Customization Options
Background Options
Your landing page background can be customized in four ways.
- Solid Color: Choose any color with the color picker
- Gradient: Create linear or radial gradients with multiple colors
- Pattern: Select from predefined patterns with customizable colors
- Image: Upload a background image for your page
Typography
Customize the fonts used throughout your page.
- Title Fonts: Choose from a variety of fonts for all headings
- Body Fonts: Select a readable font for regular text
- Size and Color: Adjust text size and color individually for each text component
Component Styling
Each component has its own styling options that may include:
- Colors (background, text, borders)
- Borders (width, radius, color)
- Padding and margins
- Alignment (left, center, right)
- Size adjustments
Spacing
Control the spacing between components.
- Select a component
- Use the spacing control in the sidebar to adjust the margin below it
- Values are in pixels
Cookie Consent
Enable and customize a cookie consent banner.
- Toggle cookie consent in the Theme tab
- Customize the banner text, button labels, and styling
- Configure which cookie categories to include
- Preview how it will appear to visitors
Saving and Publishing
Saving Your Work
Your work is not automatically saved so you'll need to manually save it.
- Click "Save changes" in the top toolbar
- The button will show "Changes saved" when your work is up to date
Previewing Your Page
Before publishing, preview your landing page.
- Click "Preview" in the top toolbar
- This opens your page in a new tab as it will appear to visitors
- Test all forms and interactions to make sure everything works correctly
Publishing Your Page
When your landing page is ready to go live.
- Click "Publish" in the top toolbar
- Confirm the publish action
- Your page will be available at
waitlister.me/p/your-slug
Once published, you can:
- Share the link with potential subscribers
- Embed it on your website
- Link to it from your social media accounts
Unpublishing
If you need to take your page offline temporarily.
- Click "Unpublish" in the top toolbar (visible only for published pages)
- Confirm the unpublish action
- Your page will no longer be accessible to the public
Landing Page Settings
The Landing Page Settings modal allows you to configure additional options for your waitlist page, including social sharing images, SEO metadata, and conversion tracking.
To access these settings:
- Navigate to your waitlist dashboard
- Click "Landing page" in the left navigation
- Click the "More" button and then "Settings"
Social Sharing Image
This allows you to customize how your landing page appears when shared on social media platforms.
Available for published landing pages only.
- Enter the URL of your desired social sharing image in the "Social image URL" field
- The recommended image size is 1200×630 pixels
- Once set, you'll see a preview of your current image
A well-designed social sharing image can increase click-through rates when your waitlist is shared on platforms like X, Facebook, or LinkedIn.
Additional SEO Settings
This section allows you to customize metadata for search engines and social media sharing, helping improve your waitlist page's visibility and appearance in search results.
Available for custom domains only.
You can configure the following SEO settings.
- Page Title (70 characters max)
- Displayed in browser tabs and search results
- Example: "Join our waitlist - Your Product Name"
- Meta Description (160 characters max)
- Appears in search engine results below the title
- Example: "Join our waitlist to be the first to know when we launch. Sign up now for early access."
- Keywords (comma separated)
- Help search engines categorize your page
- Example: "waitlist, early access, product launch"
- Social Title (optional)
- Custom title used when shared on social media
- If not specified, the Page Title will be used instead
- Social Description (optional)
- Custom description used when shared on social media
- If not specified, the Meta Description will be used instead
Tracking
The tracking section allows you to integrate analytics and conversion tracking tools to measure the performance of your waitlist page.
Available in Growth plan.
- Facebook Pixel
- Enter your Facebook Pixel ID (numeric only)
- Automatically tracks the "CompleteRegistration" event when users join your waitlist
- Google Tag
- Enter your Google Tag ID (format: G-XXXXXXXXXX)
- Automatically tracks the "conversion" event when users join your waitlist
Best Practices
Design Tips
- Keep it simple: Focus on one clear call-to-action
- Use whitespace: Don't overcrowd your page
- Consistent branding: Use your brand colors and fonts
- Mobile-first: Design with mobile users in mind
- Visual hierarchy: Make important elements stand out
Content Tips
- Clear value proposition: Explain what subscribers get
- Concise copy: Keep text brief and engaging
- Social proof: Show existing interest when possible
- Trust signals: Include testimonials or logos if available
- Clear next steps: What happens after signing up?
Landing Page Essentials
Every effective waitlist landing page is recommended to include these elements.
- An attention-grabbing headline
- A brief explanation of your product/service
- The benefit of joining the waitlist
- A simple sign-up form
- A compelling call-to-action button
Troubleshooting
Changes Not Saving
- Check your internet connection
- Try refreshing the page
- Look for error messages
Images Not Uploading
- Check file size (max 2MB)
- Ensure proper file format (PNG/JPEG)
- Try compressing the image
Layout Problems
- Check padding values
- Verify mobile responsiveness
- Adjust section spacing
Undo/Redo Not Working
- Only the last 20 actions are stored in history
- Page refreshes will clear the history
Help and Support
Need assistance with waitlist configuration? We're here to help.
- Contact us via the public contact form
- Access the "Help" page in your account dashboard