Features
Email Broadcasts

Email broadcasts allow you to send targeted updates and announcements to your waitlist subscribers. This powerful feature helps you maintain engagement, share product news, and build relationships with your audience throughout the waiting period.
Getting Started with Broadcasts
Accessing the Broadcasts Feature
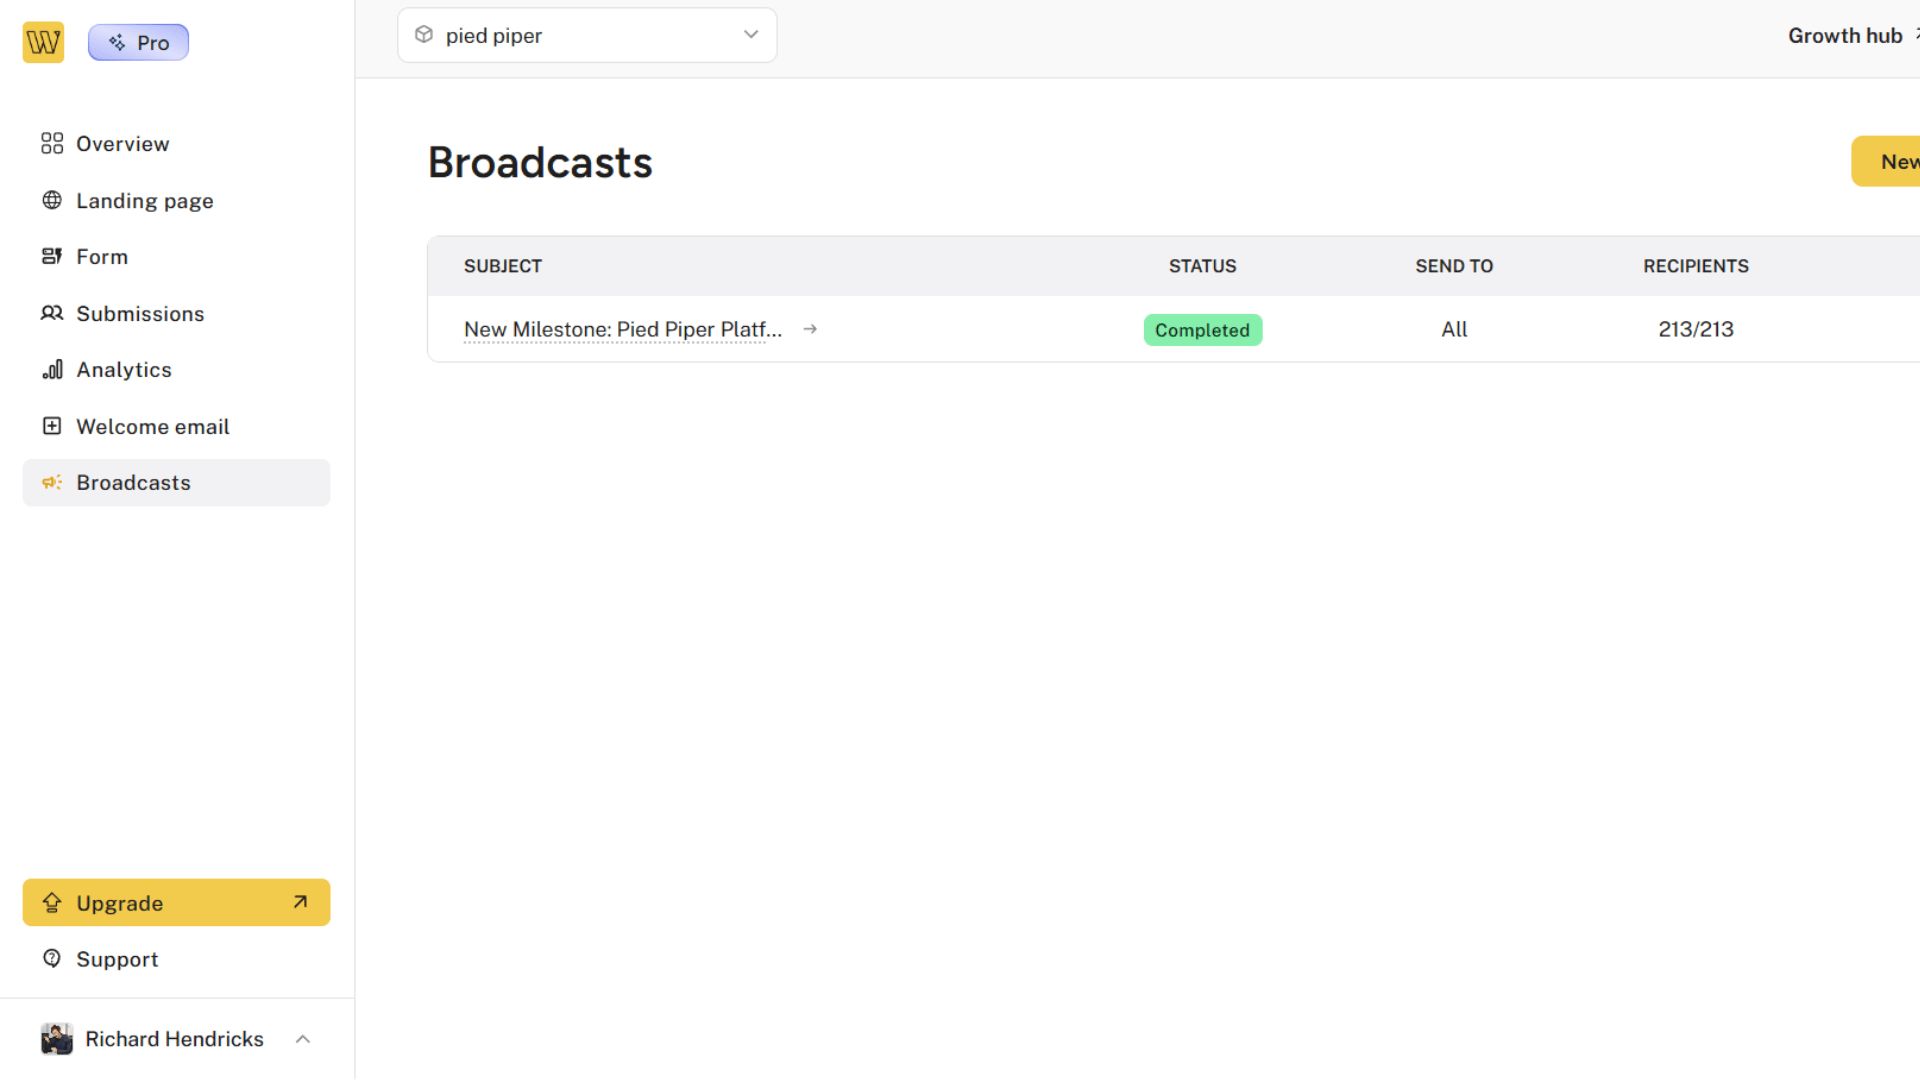
- Navigate to your waitlist dashboard
- Click "Broadcasts" in the sidebar navigation
- You'll see a list of all your existing broadcasts with their current status
Creating a New Broadcast
To create a new email broadcast:
- Click the "New broadcast" button in the top-right corner of the broadcasts page
- This will take you to the broadcast editor where you can compose your message
Configuring Your Broadcast

The broadcast editor provides many options for customizing your email.
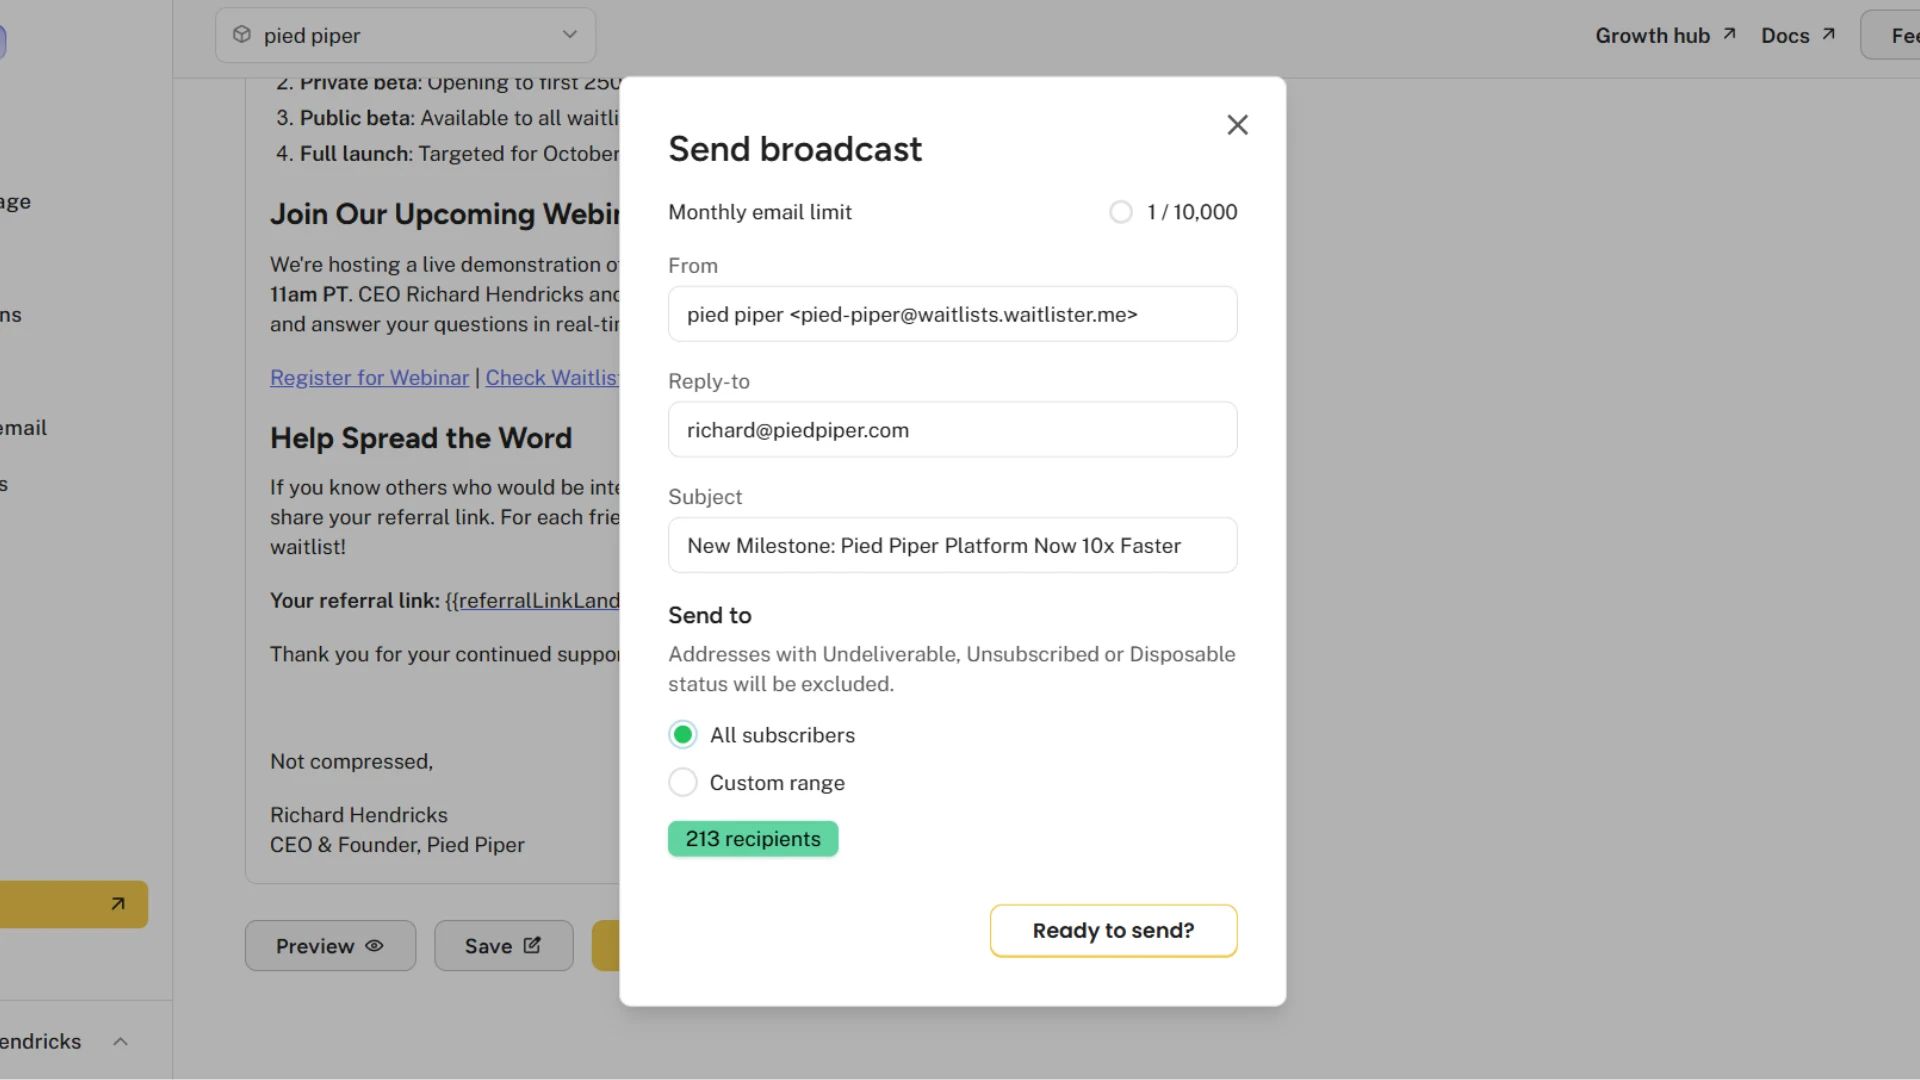
Sender Information
- Sender Name: The name that will appear as the sender in recipients' inboxes
- Sender Email: The email address that will be used to send the broadcast
- You can use your default Waitlister domain
- Scale users can also use a verified custom domain
- Reply-To Address: An optional email address where replies will be directed (if different from the sender)
Email Content
- Subject Line: The subject of your email broadcast
- Content Editor: A rich text editor for creating your email content
- Format text with bold, italic, and other styling options
- Insert links to external resources
- Add images
- Customize the background color to match your brand
- Preview Option: See how your email will look to recipients before sending
Sending Your Broadcast
Once you've prepared your broadcast, you have several options.
Save as Draft
Click the "Save" button to store your broadcast as a draft without sending it. This allows you to:
- Work on the content over multiple sessions
- Get approval from team members before sending
- Finalize your messaging later
Preview Before Sending
Always preview your broadcast before sending it.
- Click the "Preview" button to see exactly how your email will appear to recipients
- Check that all links work correctly
- You can also send a test email to yourself
Send Options
You can choose the audience you want to receive the broadcast.
- All Subscribers: Send to everyone on your waitlist
- Custom Range: Target subscribers within specific positions (e.g., positions 1-100)

Managing Your Broadcasts
Broadcast Status
Each broadcast in your list will show its current status.
- Draft: Saved but not yet sent
- Running: Currently being sent to recipients
- Completed: Successfully sent to all recipients
- Some Failed: Sent but failed for some recipients
- Failed: Broadcast could not be sent
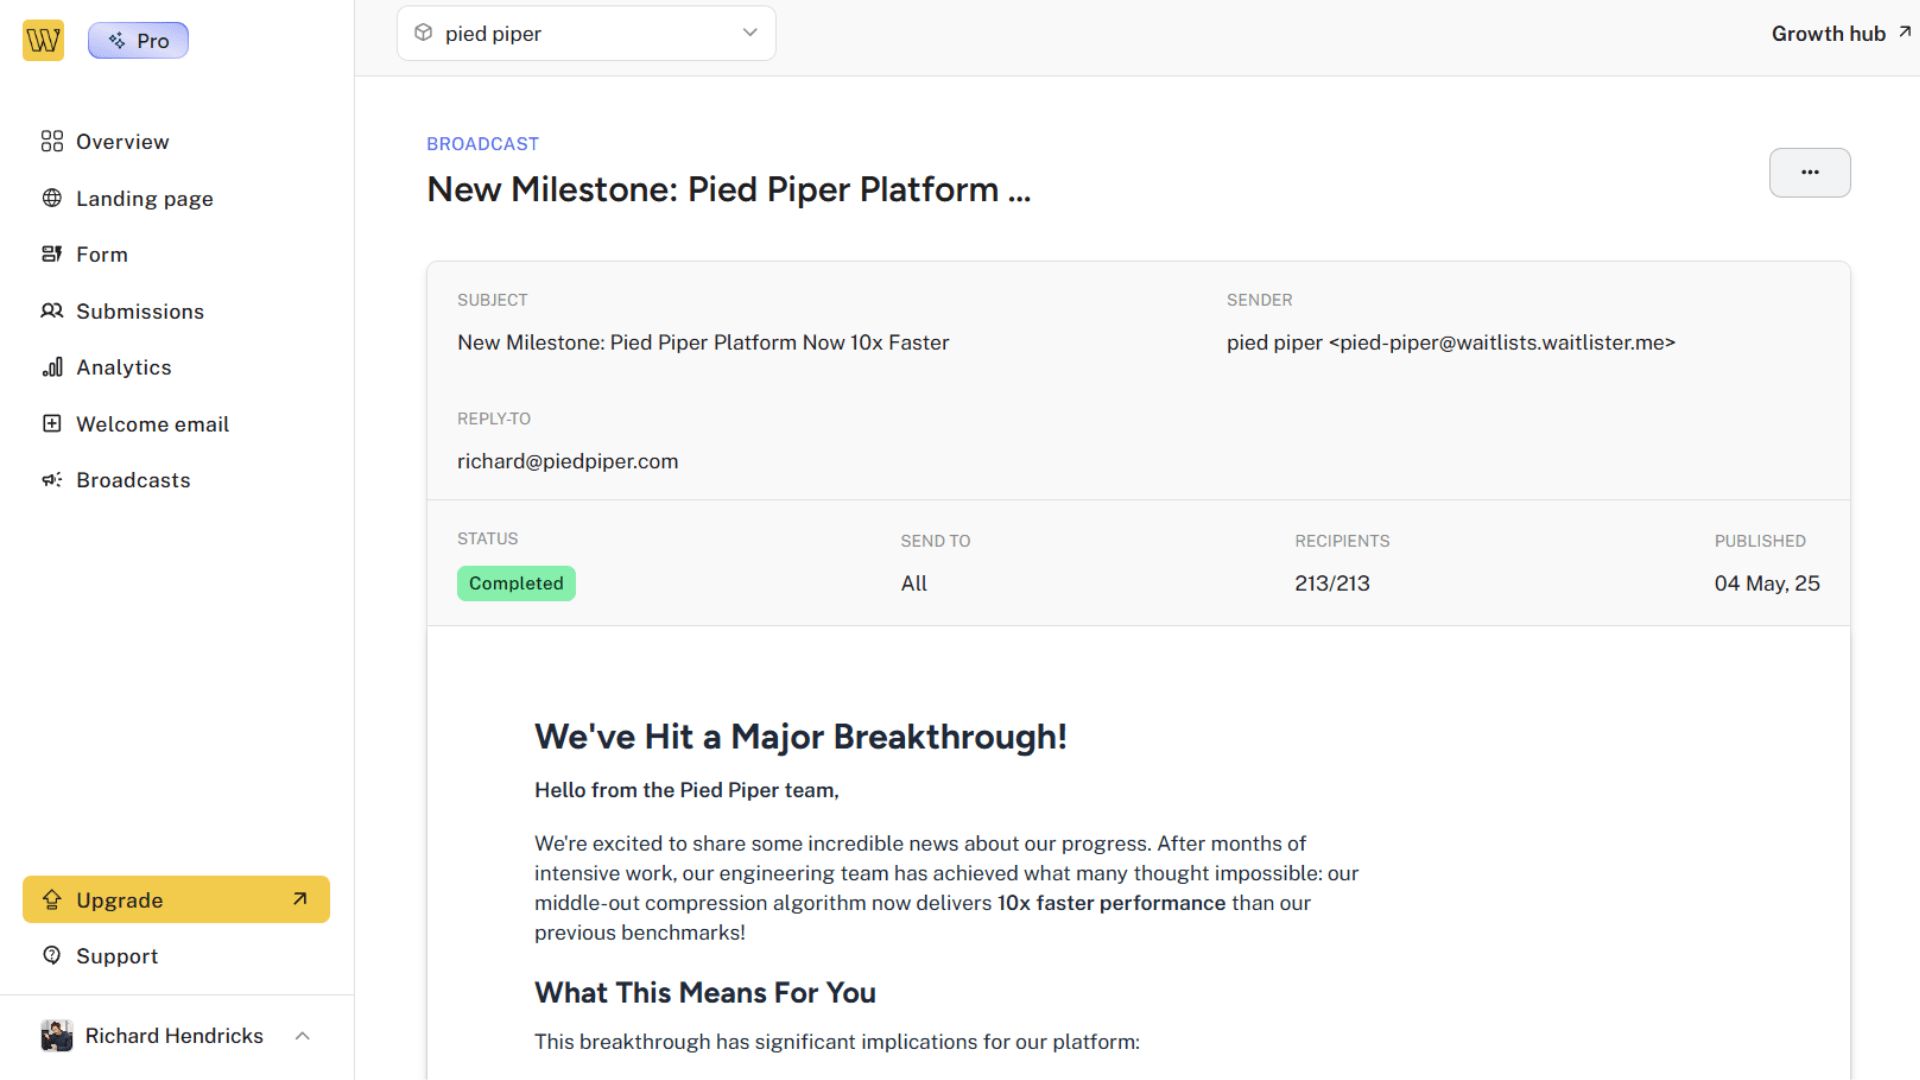
Viewing Broadcast Details
To see details about a specific broadcast:
- Click on the broadcast subject in your broadcasts list
- This opens a page showing:
- Complete content of the email
- Sender and reply-to information
- Status and recipient statistics
- Send date and time
Troubleshooting
Delivery Problems
- Verify your sender email is correctly formatted
- Check that your custom domain is properly verified (if applicable)
- Ensure your email content doesn't contain spam triggers
Display Issues
- Use the preview function to test appearance before sending
- Keep HTML structure simple for maximum compatibility
- Optimize images for email (compressed, properly sized)
Low Engagement
- Test different subject lines and content formats
- Send at different times to identify optimal engagement periods
- Ensure your content provides clear value to subscribers
Help and Support
Need assistance with broadcasts? We're here to help.
- Contact us via the public contact form
- Access the "Help" page in your account dashboard
