Waitlist
AI Page Builder
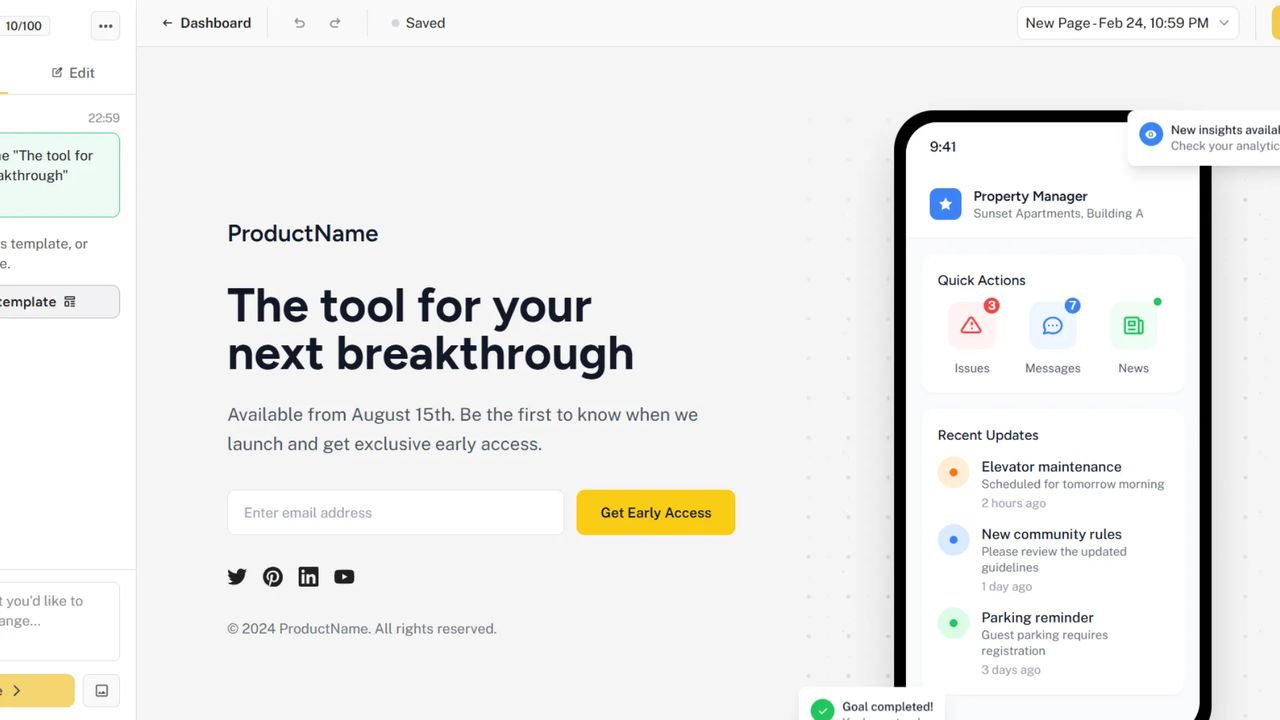
The AI Page Builder lets you generate a professional waitlist landing page in seconds. Describe your product in plain language, and the AI will produce a complete, fully styled page — no design experience required.
Getting Started
Opening the AI Page Builder
- Navigate to your waitlist dashboard
- Click Landing page in the left navigation
- Select AI Builder
The first time you open the builder, an instructions modal will appear with a quick overview of the steps and your current credit balance.
Creating Your First Page
- Type a description of your product or service in the chat input
- Optionally upload up to 3 reference images to guide the design
- Click Create
The AI will stream your page in real time. Once it finishes, the preview updates with your new design.
Tips for a great first prompt:
- Describe your product clearly: "A SaaS tool for scheduling social media posts"
- Include your target audience: "aimed at solopreneurs and small marketing teams"
- Mention visual preferences: "clean and minimal, dark background, blue accent color"
- The more context you provide, the better the result
Editor Interface
Top Toolbar
- Undo / Redo: Revert or reapply changes (
Ctrl+Z/Ctrl+Shift+Z) - Draft status: Shows whether your latest changes have been saved
- Conversation selector: Switch between past design conversations
- Publish / Update: Make your page live or push updates to an already-published page
Sidebar Modes
The left sidebar has three modes you can switch between.
Chat Mode
Use chat to generate and refine your page through conversation.
- Type a follow-up message to improve the current design — for example, "Make the headline larger" or "Use a warmer color palette"
- Upload up to 3 images per request as design references or page assets
- Previous AI responses appear in the chat history; click Apply design on any response to restore that version
Edit Mode
Edit mode lets you select and style individual elements directly in the preview.
- Click any element in the preview to open the Style Panel for that element
- Double-click any text to edit its content inline without leaving the editor
Style Panel
When you click an element in Edit mode, the Style Panel opens with collapsible sections.
| Section | What you can control |
|---|---|
| Text | Color, size, weight, alignment, line height, letter spacing |
| Background | Solid color or gradient (with angle control) |
| Spacing | Padding and margin |
| Effects | Border radius, border, shadow, opacity |
| Image | Replace the image source |
| HTML | Edit the element's raw HTML directly |
Click Reset to restore an element's styles to the original generated defaults.
Conversations and Versions
Each time you send a message, a new version is saved in the current conversation. You can create multiple conversations to explore completely different design directions.
Switching Conversations
- Click the conversation selector in the top toolbar
- Select any past conversation to load it into the preview
- Your unpublished draft remains separate from any live page
Managing Conversations
From the sidebar you can:
- New conversation: Start a fresh design from scratch
- Rename: Give a conversation a descriptive name to keep things organised
- Delete: Remove conversations you no longer need
Credits
Each generation costs credits from your plan's balance.
| Request type | Credit cost |
|---|---|
| Text-only generation | 1 credit |
| Generation with images | 2 credits |
Credits are reserved before a request starts and refunded automatically if the generation fails. Your remaining balance is shown at the top of the sidebar.
Credit limits and reset schedules vary by plan. Check your billing settings for details.
Saving and Publishing
Draft Auto-Save
The editor automatically saves your changes as you work. The toolbar shows the current draft status so you always know if unsaved changes exist.
Publishing Your Page
When your page is ready to go live:
- Click Publish in the toolbar
- Your page will be available at
waitlister.me/p/your-slug
Updating a Live Page
After making further edits to an already-published page:
- Make your changes in the editor
- Click Update in the toolbar
- The live page reflects your changes immediately
Unpublishing
To take your page offline temporarily:
- Click Unpublish in the toolbar
- Confirm the action
- Your page is removed from the public URL — your draft is preserved
Best Practices
Writing Effective Prompts
- Be specific about your product: The more context the AI has, the more relevant the output
- Name the style you want: Words like "minimal", "bold", "playful", or "dark" go a long way
- Iterate with short follow-ups: Instead of regenerating from scratch, ask for targeted edits — "Change the CTA button to orange and make it larger"
- Use images as references: Upload a competitor page screenshot, mood board, or your existing brand assets
Editing Tips
- Use Chat Mode for big structural or stylistic changes and Edit Mode for fine-tuning individual elements
- Inline text editing (double-click on text) is the fastest way to update copy
- Rename your conversations before experimenting so you can always return to a known-good version
Troubleshooting
Generation Failed or Timed Out
- Check your internet connection and try again
- Credits are automatically refunded on failed requests — if a credit was still consumed, contact support
Styles Not Applying
- Make sure you're in Edit Mode before clicking elements in the preview
- Click Reset in the Style Panel to clear any conflicting inline styles
Undo Not Working
- Undo/redo history is cleared on page refresh
- Switch to a previous conversation to go back further
Help and Support
Need assistance with the AI Page Builder? We're here to help.
- Contact us via the public contact form
- Access the Help page in your account dashboard