Migrate from Google Sheets to Waitlister in 10 Minutes
You started simple. Someone expressed interest, you added their email to a Google Sheet. Then 50 more came in. Then 200. Maybe you added columns for "referral source" or "priority tier" or "contacted?" and started color-coding rows.
Now you have a spreadsheet that's become the most critical part of your pre-launch — and also the most fragile. There's no way to email your list from a spreadsheet. No referral tracking. No landing page. No analytics. And if you accidentally delete a row or sort the wrong column, your waitlist data is gone.
This guide shows you how to move everything from Google Sheets to Waitlister in about 10 minutes. Your existing signups keep their position, and you immediately get the tools a spreadsheet can never give you: email broadcasts, a referral leaderboard, position tracking, and a real landing page. (Comparing platforms first? See our roundup of the best waitlist software.)
Why upgrade from Google Sheets
A spreadsheet is a perfectly fine place to start collecting emails. It becomes a problem when you need to do anything with them.
What breaks when you run a waitlist from a spreadsheet
- You can't email your list. You'd need to copy every address into a separate email tool, manage unsubscribes manually, and hope you don't end up in spam. Most founders just... don't email their list at all.
- You can't run referrals. There's no way to generate unique referral links, track who referred whom, or reward top referrers. Every new signup is something you have to drive yourself.
- You can't show positions. Subscribers have no idea where they stand. There's no urgency, no reason to share, and no incentive to stay engaged.
- You can't collect signups automatically. Unless you've wired up a Google Form or Zapier integration, adding new subscribers means manually typing emails into cells.
- There's no fraud protection. Anyone with the sheet link (if shared) can see the full list. There's no email validation, no duplicate detection, and no bot filtering.
- It doesn't scale. At 20 signups, a spreadsheet is fine. At 500, you're spending more time managing the sheet than building your product.
- One mistake can break everything. An accidental sort, a deleted column, a formula that overwrites data — spreadsheets have no undo history for bulk operations and no concept of data integrity.
Signs you've outgrown your spreadsheet
- You have 50+ emails and haven't sent a single one
- You're manually copying data between your sheet and other tools
- You wish subscribers could refer their friends
- You've thought about building a "real" landing page
- You're nervous about accidentally breaking the spreadsheet
- Multiple people need access and you're worried about accidental edits
Step-by-step migration
The whole thing takes about 10 minutes. You need your Google Sheet and a free Waitlister account.
Step 1: Clean up your Google Sheet
Before exporting, make sure your data is ready:
- Find your email column. It might be labeled "Email," "Email Address," "email," or something else. Rename the header to just
email(lowercase). - Find your name column (if you have one). Rename the header to
name(lowercase). - Sort by signup order. If you have a date/timestamp column, sort the sheet by that column (oldest first). This preserves the original signup order when imported. If you don't have dates, the current row order is used.
- Delete extra columns. Waitlister imports
emailandname. Any other columns ("Source," "Notes," "Contacted?," "Priority") can be deleted from the export copy — they won't be imported. Make a copy of the sheet first if you want to keep those columns.
Your cleaned sheet should look like:
| name | |
|---|---|
| sarah@example.com | Sarah Chen |
| james@example.com | James Wilson |
| alex@example.com | Alex Rivera |
Or just emails if you didn't collect names:
| sarah@example.com |
| james@example.com |
| alex@example.com |
Make a copy of your original sheet before modifying it: File > Make a copy. Work from the copy so your source data stays intact.
Step 2: Export as CSV
- In Google Sheets, go to File > Download > Comma Separated Values (.csv)
- Save the file to your computer
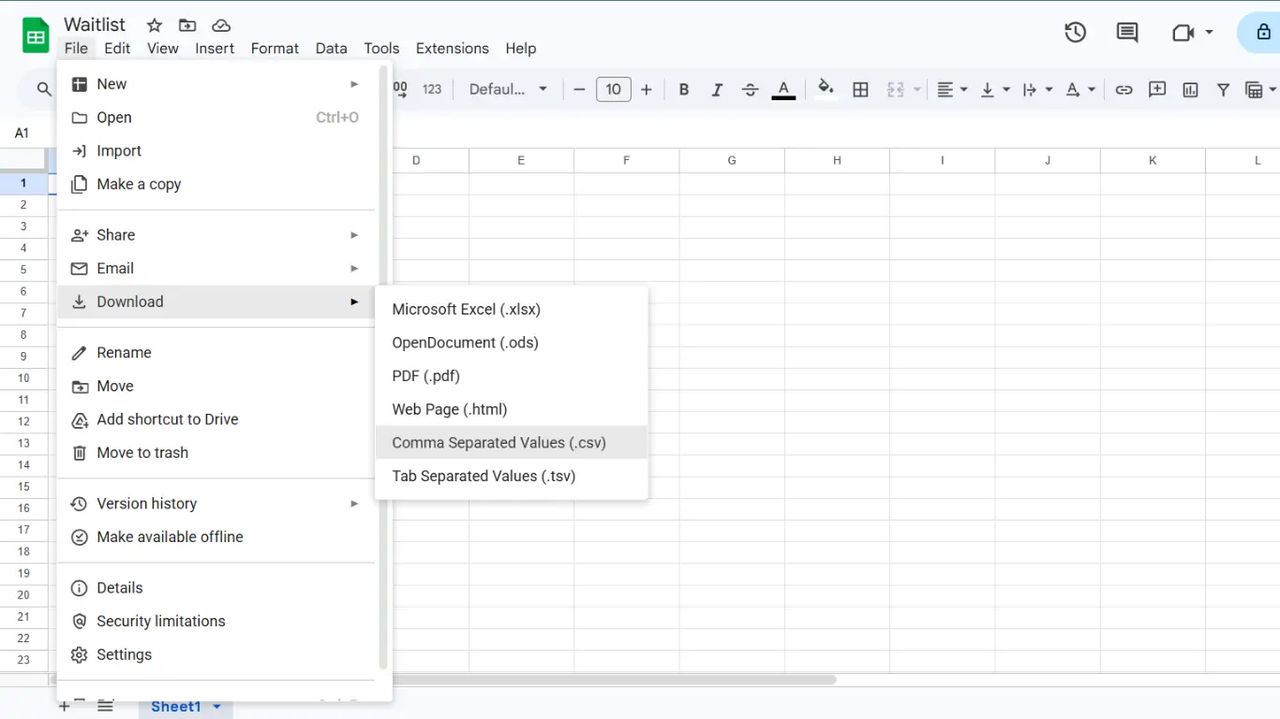
That's it. The CSV file is what you'll upload to Waitlister.
Step 3: Create your Waitlister account and waitlist
- Sign up at waitlister.me/sign-up — free, no credit card
- Create a new waitlist from the dashboard
- Optionally, build a landing page with the drag-and-drop editor or AI page builder to replace your spreadsheet signup flow
Step 4: Import the CSV
- In your waitlist dashboard, go to Subscribers
- Click Import (available on Growth plan and above)
- Upload your CSV file
- Waitlister validates each row and imports valid subscribers
- Review the import summary: successful imports, skipped duplicates, and invalid emails
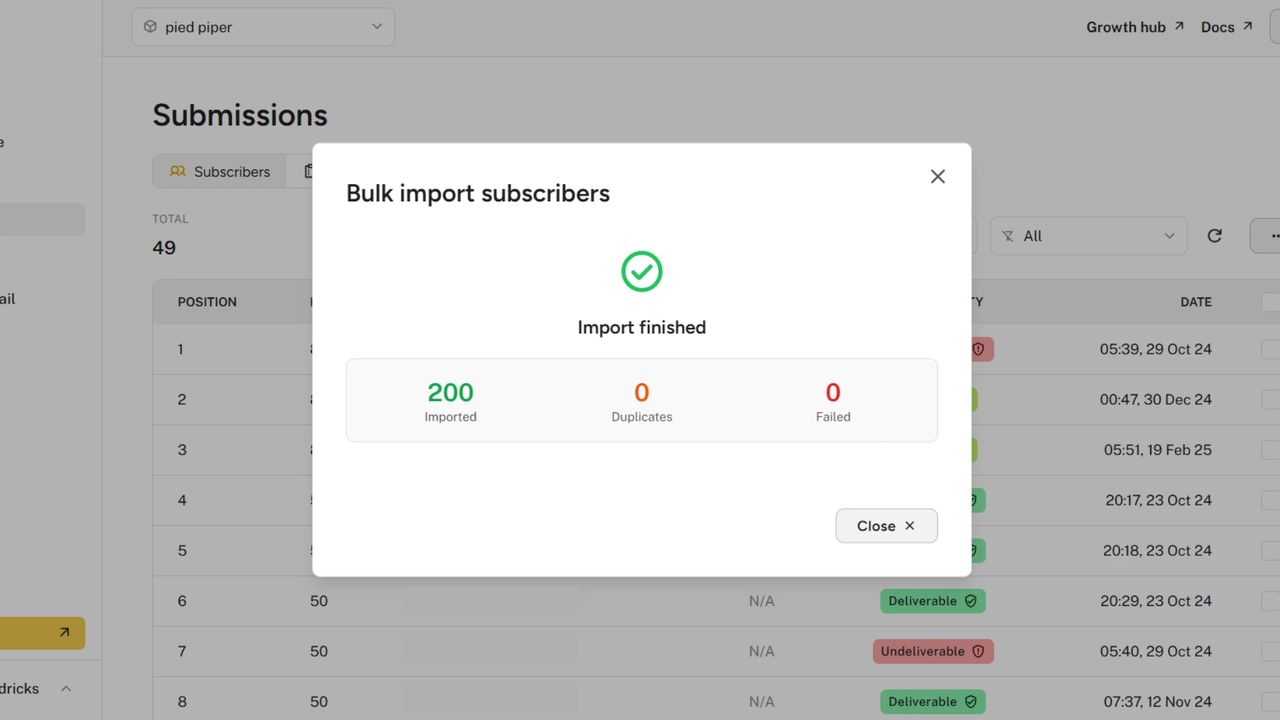
Subscribers are assigned positions based on CSV row order. Row 1 (after the header) gets position #1, row 2 gets position #2, and so on. If your sheet was sorted chronologically, the positions match your original signup order.
Bulk CSV import requires the Growth plan ($49/mo). For smaller lists (under 100), you can add subscribers on the Free plan using the API or the manual add feature in your dashboard.
Step 5: Send your first email
The first thing you should do after importing: email your list. They signed up, maybe weeks or months ago, and have heard nothing since.
- Go to Broadcasts in your dashboard
- Click Create broadcast
- Write a re-engagement email. For example:
Subject: You're on the Product Name waitlist — here's your spot
Hey ,
You signed up for early access to Product Name a while back. We're getting close to launch, and you're currently # on the waitlist.
Want to move up? Share your personal referral link and earn points for every friend who joins:
More referrals = higher position = earlier access.
- Preview and send

This one email re-engages your dormant list, introduces the referral program, and starts building your sending reputation with email providers.
What you unlock after migration
Here's what changes when your waitlist moves from a spreadsheet to Waitlister.
Email broadcasts
Send emails directly from Waitlister — welcome messages, product updates, launch announcements, milestone celebrations. No copying emails into another tool. Available from Launch plan ($15/mo) with up to 2,500 emails/month, scaling to 50,000/month on Business.
Personalize with template variables: {{subscriber.name}}, {{subscriber.position}}, {{subscriber.referral_link}}, {{subscriber.points}}. Learn more →
Referral leaderboard
Every subscriber gets a unique referral link. When they share it and someone signs up through it, they earn points and move up the leaderboard. This is the single biggest upgrade from a spreadsheet — your existing signups become an active distribution channel.
Waitlister includes device-fingerprint fraud detection to block fake referrals from the same device across different browsers. Learn more →
Position tracking
Every subscriber sees their position in line. "You're #47 of 812." This creates urgency, incentivizes referrals ("refer 3 friends to move up"), and makes your waitlist feel real — not just a form submission into a void.
If you had signups from other sources before this sheet, use position inflation to offset the numbers so positions reflect your full list, not just the imported batch.
Custom domain emails
Send from hello@yourcompany.com instead of a generic address. This improves deliverability (especially important after importing a large list that hasn't heard from you) and looks professional. Add a few DNS records, Waitlister configures DKIM and SPF automatically via Resend. Learn more →
Multilingual support
Waitlister translates the waitlist UI, confirmation emails, and referral pages in 30+ languages out of the box. If your spreadsheet had international signups, they'll see the waitlist in their own language. Available on Growth plan and above.
Common migration issues
Duplicate emails in your spreadsheet
If the same email appears multiple times (common in manually maintained sheets), Waitlister imports the first occurrence and skips the rest. The import summary shows how many duplicates were skipped.
Tip: If you want to check for duplicates before exporting, use Google Sheets' built-in tool: Data > Data cleanup > Remove duplicates.
Emails in wrong format
If your sheet has entries like "sarah at example dot com" or cells with extra spaces, Waitlister skips them during import and flags them as invalid. Clean these up in your sheet before exporting, or fix them after import by checking the error report.
Common issues to fix in your sheet before export:
- Leading/trailing spaces: use
=TRIM(A2)in a helper column - Mixed case: not a problem (email addresses are case-insensitive)
- Cells with names instead of emails: delete or move to the
namecolumn
Email deliverability after importing a cold list
If your signups are weeks or months old and haven't received any email from you, some addresses may be abandoned, and email providers may be suspicious of a new domain suddenly sending hundreds of emails. To manage this:
- Set up a custom email domain first. 5-minute setup →
- Send to smaller batches first. Start with your 50–100 most recent signups (most likely to engage), then broaden.
- Expect some bounces. Old email addresses go inactive. Waitlister handles bounces automatically — they won't hurt your list.
- Write a genuine re-engagement email (not a sales pitch). Subscribers who open and click signal to email providers that your messages are wanted.
My spreadsheet had extra columns (source, notes, priority)
Waitlister imports email and name only. Extra columns are ignored during import — they won't cause errors, but the data won't be preserved in Waitlister.
If you want to carry over "source" information, consider using subscriber tags after import. For example, tag all imported subscribers as "google-sheets-batch-1" to distinguish them from future organic signups.
Frequently Asked Questions
Will my existing signups need to re-confirm their email?
No. Subscribers imported via CSV are added directly — no confirmation email is sent. They already opted in when they gave you their email address.
If you want double opt-in for new signups going forward, enable it in your waitlist settings. It won't retroactively affect imported subscribers.
Can I keep the signup order from my spreadsheet?
Yes. Waitlister assigns positions based on CSV row order. Sort your Google Sheet chronologically before exporting (oldest signup first), and position #1 goes to your earliest subscriber.
If your spreadsheet data combines signups from multiple sources and you want positions to reflect the total count, use position inflation. For example, if you had 200 signups through a landing page that aren't in this sheet, set inflation to 200 — imported subscribers start from position #201.
Can I import a Google Sheet directly without exporting to CSV?
Not directly. Waitlister's import accepts CSV files. The export step takes about 10 seconds: File > Download > Comma Separated Values (.csv). If you have a live Google Sheet connected to a form and want ongoing sync instead of a one-time import, use the Waitlister API to push new entries programmatically — for example, via a Google Apps Script trigger.
How long does custom email domain setup take?
DNS verification typically takes a few minutes to a few hours. In rare cases, propagation can take up to 48 hours. Waitlister checks automatically every 15 minutes and notifies you when it's done. Full setup guide →
What if I want to keep collecting signups in Google Sheets too?
You can, but it creates a split-brain problem — signups in two places, no referral tracking on the Sheets side, manual re-syncing required. The better approach is to replace the Google Sheet with a Waitlister landing page or embed widget. All new signups then go directly into Waitlister with referral tracking, position assignment, and welcome emails.
If you absolutely need to keep the Sheet (e.g., it's connected to another internal system), you can set up a one-way sync from Google Sheets to Waitlister using the API and a Google Apps Script that triggers on new rows.
Is there a free way to do this migration?
The Waitlister account is free. The bulk CSV import tool requires the Growth plan ($49/mo), but if your list has fewer than 100 subscribers, you can add them on the Free plan using the API or the manual add feature in the dashboard — no upgrade needed. You can also start on Free to build your landing page and configure everything, then upgrade briefly to import, then decide whether to keep the paid plan.
Can I go back to Google Sheets if Waitlister doesn't work out?
Yes. You can export all your Waitlister subscribers as CSV at any time from the Subscribers page. The export includes email, name, position, referral count, points, and signup date — more data than you started with.
Ready to replace your spreadsheet with a real waitlist?